Loofah Plant Cultivating Your Own Natural Sponges and Sustainable Garden Delights
Sep
Growing your own loofah plant can be a rewarding experience. These unique plants offer more than just beauty. They provide natural sponges and sustainable garden delights.
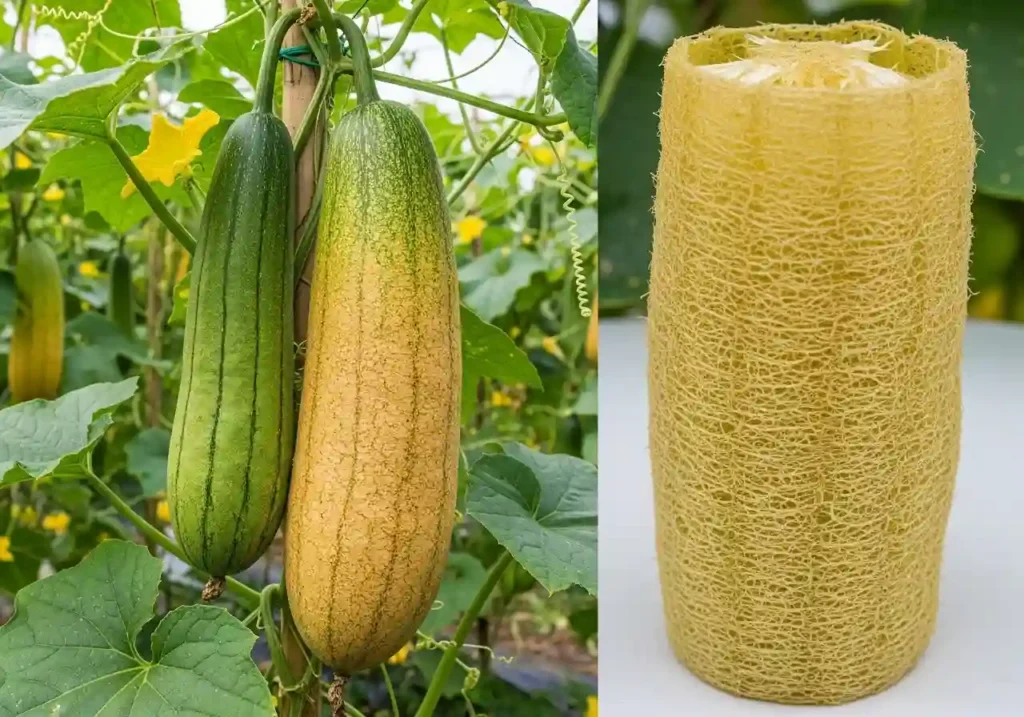
Loofahs are part of the cucumber family. They are known for their fibrous interior. This interior is perfect for use as a natural sponge.
Cultivating loofahs is an eco-friendly choice. It reduces reliance on synthetic sponges. Plus, it adds a touch of nature to your home.
Loofah plants thrive in warm climates. They need a long growing season. With the right care, they can flourish in your garden.
Starting loofah seeds indoors can extend their growing season. This is especially useful in cooler climates. It ensures a successful harvest.
Loofah vines can grow up to 30 feet long. They require sturdy support. A trellis or fence works well.
Join us as we explore the world of loofah plant cultivation. Discover how to grow your own natural sponges. Enjoy the sustainable benefits they bring.
What Is a Loofah Plant? Origins, Varieties, and Uses
The loofah plant, also known as luffa, belongs to the cucumber family. This tropical vine is renowned for its unique fibrous interior, perfect for natural sponges. Loofahs have been used for centuries in various cultures.
A loofah plant comes in a few different varieties. The most common are the angled loofah and the smooth loofah. Both types are valued for their versatile uses beyond the sponge.
Loofahs aren’t just for bathing. They serve numerous purposes around the home. Explore their potential as cleaning tools, craft supplies, and even as a tasty vegetable when young and tender.
Here’s a quick list of loofah plant uses:
- Bath sponges
- Cleaning brushes
- Craft projects
- Edible vegetables when immature
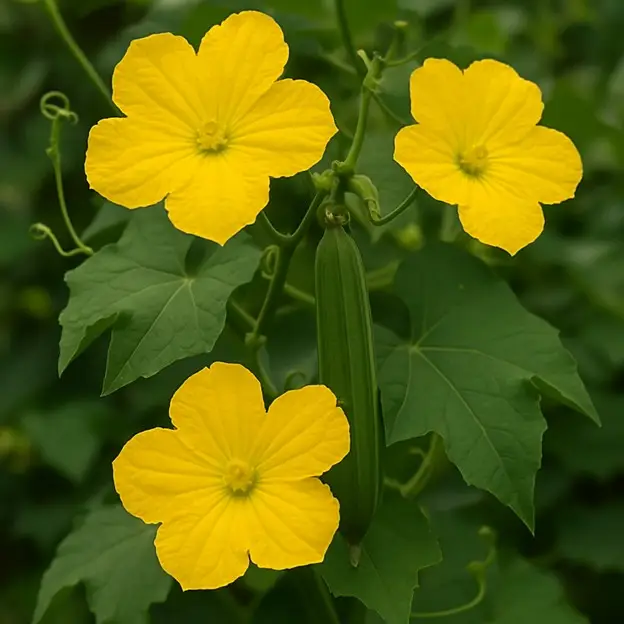
Understanding what a loofah plant looks like can help you identify them in nurseries or gardens. Look for lush, leafy vines with vibrant yellow flowers. These blooms attract pollinators, which are vital for growing loofah sponges.
The Lifecycle of the Loofah: From Seed to Sponge
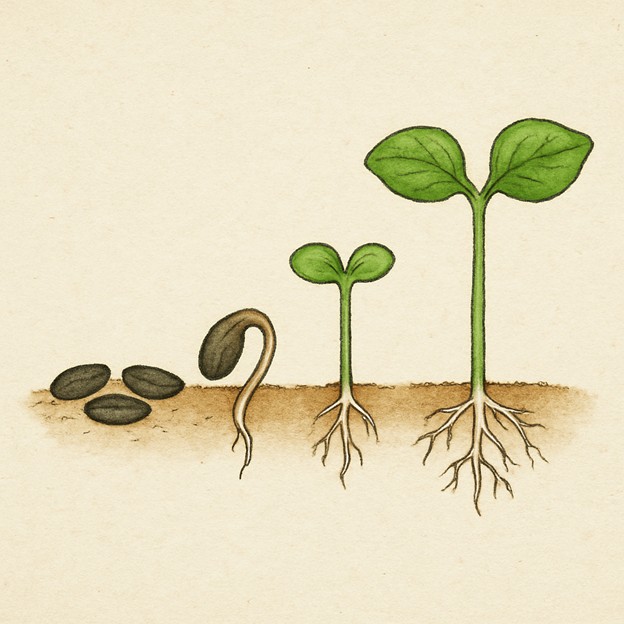
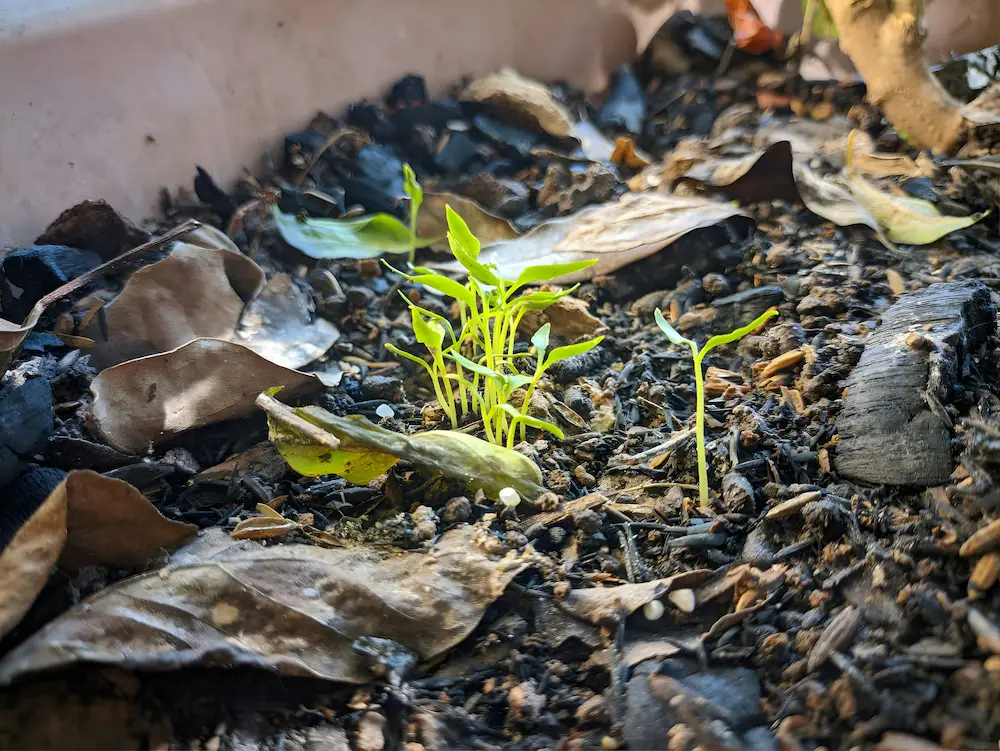
The lifecycle of a loofah plant begins with a simple seed. Given the right conditions, these seeds sprout into robust plants. The journey to becoming a loofah sponge is both fascinating and rewarding.
The germination process starts when seeds are planted in warm soil. Seeds quickly develop into seedlings, showing promise as future vines. Once established, these green luffa plants extend rapidly.
Soon, the loofah plant yields yellow flowers. These blooms are critical for pollination and eventual fruit development. Pollinated flowers transform into fruits, ultimately becoming loofah gourds.
As loofah gourds mature, they grow larger and heavier. They slowly transition from green to brown. Harvesting occurs when gourds dry naturally on the vine.
In summary, the loofah plant lifecycle includes:
- Germination
- Seedling growth
- Flowering
- Fruit development
- Drying on the vine
Choosing the Right Loofah Variety and Seeds
Selecting the ideal loofah variety is crucial for successful cultivation. Loofah plants fall into two major types: smooth and ridged. Each type offers unique features suitable for different uses and climates.
When choosing seeds, consider your growing conditions. Ridged varieties often thrive in diverse environments. These types generally produce strong, fibrous sponges.
Evaluate your needs before planting. Preferred uses might dictate your choice. Consider this list:
- Smooth loofahs: Best for eating when young.
- Ridged loofahs: Ideal for durable sponges.
- Local varieties: Better adapted to regional climates.
Secure quality seeds from reputable sources. This ensures a healthy loofah plant start.
Loofah Growing Zones and Climate Requirements
Loofah plants thrive in warm climates, needing around 150 to 200 frost-free days. They grow best in USDA hardiness zones 7-11. These zones provide the warmth necessary for optimal growth and fruiting.
A location with full sunlight enhances the vine’s growth. Well-drained soil is essential to prevent root rot. Areas with high humidity can speed up growth.
Consider these climate necessities:
- Full sun exposure.
- Well-drained, rich soil.
- Moderate to high humidity for faster growth.
Adjust planting times to match your zone’s frost dates. This precaution helps protect young plants from cold damage.
How to Grow a Loofah Plant: Step-by-Step Guide
Growing a loofah plant requires a few steps and proper conditions. Start by selecting high-quality seeds suited for your climate. Germination is the first critical phase.
Before planting, soak loofah seeds in warm water overnight. This helps soften the shell, speeding up germination. Begin indoors if your climate has short growing seasons.
Follow these initial steps:
- Soak seeds overnight for better germination.
- Prepare seed trays with rich potting soil.
- Plant seeds about 1 inch deep.
After germination, loofah seedlings need a lot of light. Place them near a sunny window or under grow lights. Keep them warm and moist but not waterlogged.
Transplant seedlings once they reach four inches tall. Ensure the last frost has passed, as loofahs are frost-sensitive. Space them properly in well-draining soil.
Outdoor growing involves:
- Digging holes 2-3 feet apart for adequate room.
- Using a trellis for vine support.
- Watering regularly but avoiding soggy soil.
Ensure full sun exposure, as loofahs love the sunlight. Fertilize with a balanced organic fertilizer to promote growth. Monitor your plants and adjust care as needed.
Regular observation aids in catching any issues early. Look for signs of pests or nutrient deficiencies. Quick action keeps your loofah plants thriving.
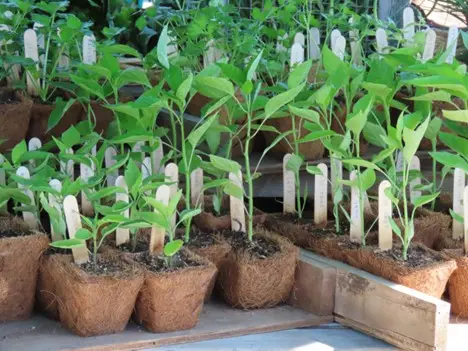
Starting Loofah Seeds Indoors: Tips for Success
Starting loofah seeds indoors can extend your growing season. This is crucial in cooler climates. Begin the process six to eight weeks before the last frost date.
Using biodegradable pots makes transplanting easier. Fill them with lightweight seed-starting mix. This ensures proper drainage and root development.
Maintaining warmth is vital for germination. Consistent temperatures between 70-85°F work best. Use a heating mat if necessary to provide steady heat.
Here are helpful tips for indoor starting:
- Select a bright location or use grow lights.
- Water gently to keep soil consistently moist.
- Monitor seedlings closely for any signs of disease.
Strong light encourages healthy growth, preventing legginess. Turn pots regularly for even exposure. This practice encourages balanced development.
Transplanting and Outdoor Planting: Timing and Techniques
Transplant loofah seedlings after the final frost. Ideal temperatures are above 60°F. Late spring is usually the perfect time for this transition.
Prepare your garden by loosening the soil. Add compost to enrich it. This boosts nutrient availability for young plants.
Gently remove seedlings from pots to avoid root damage. Space them 3 feet apart for room to grow. Press soil around roots to ensure good contact.
Consider these tips when transplanting:
- Choose a sunny location for planting.
- Water thoroughly after transplanting.
- Use mulch to retain soil moisture and suppress weeds.
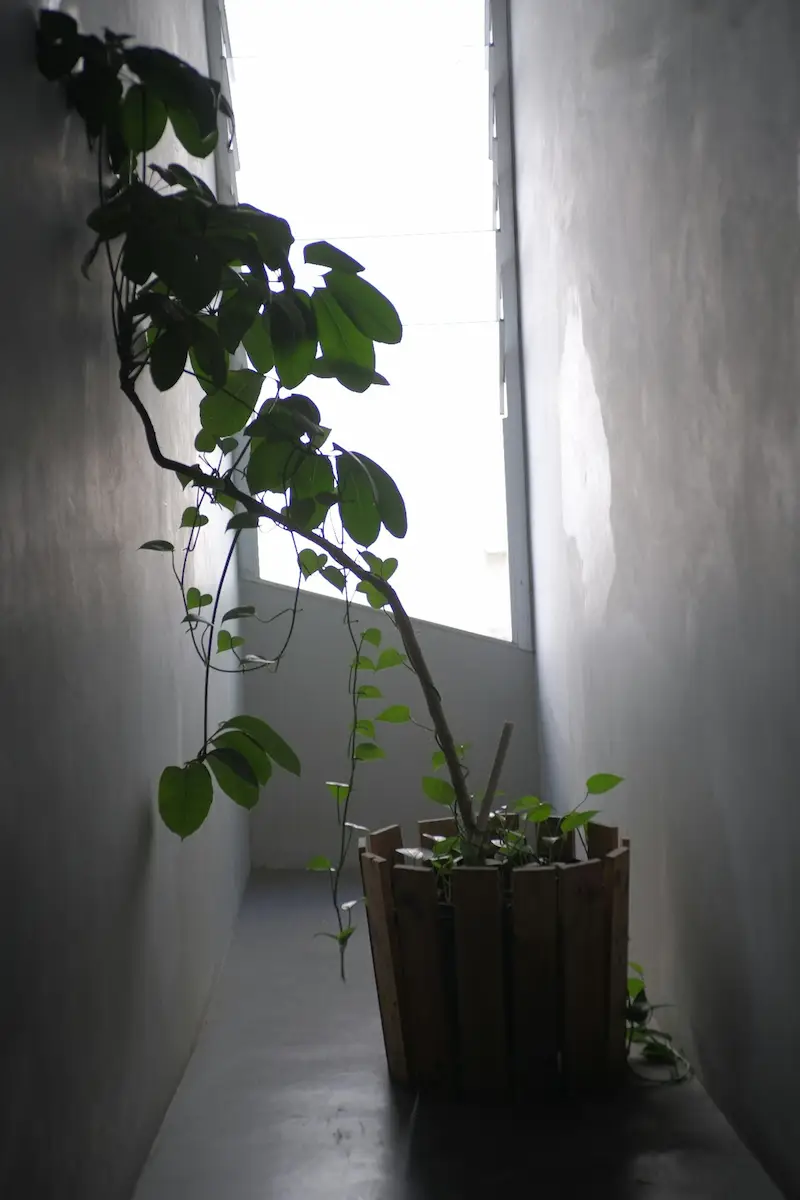
Supporting Your Loofah Vines: Trellises and Training
Loofah vines need strong support for optimal growth. They can reach up to 30 feet in length. A sturdy trellis provides the necessary structure.
Train the vines to climb and spread. This ensures better sun exposure and air circulation. Secure vines gently to the trellis with garden ties.
Consider these support tips:
- Install trellises before transplanting loofahs.
- Use materials like bamboo or metal stakes.
- Regularly adjust ties as vines grow.
Watering, Feeding, and Organic Care for Healthy Loofahs
Proper watering is crucial for robust loofah plants. Loofahs thrive in consistently moist soil. During dry spells, ensure they receive extra water.
Feeding loofah plants enhances their growth. Use organic fertilizers to enrich the soil. Balance is key; avoid over-fertilization which can hinder fruit development.
Organic care helps maintain plant health. Implement natural pest control methods. Products like neem oil deter aphids and beetles.
Here’s how to care for your loofahs:
- Water deeply once a week.
- Apply compost or organic fertilizer bi-monthly.
- Monitor for pests regularly.
Common Pests and Problems: Prevention and Solutions
Loofah plants, like all garden plants, face pest challenges. Aphids and cucumber beetles are the main culprits. They can damage leaves and stunt growth.
Prevention is your first line of defense. Plant loofahs near natural repellents such as marigolds. This discourages harmful insects.
If pests appear, take action quickly. Use organic options to minimize harm. Neem oil and insecticidal soap are effective choices.
Key tips for managing pests:
- Inspect plants weekly for any signs of infestation.
- Encourage beneficial insects like ladybugs in your garden.
- Keep plants healthy to resist disease naturally.

Loofah Flowers and Pollination: Ensuring Fruit Set
Loofah plants produce vibrant yellow flowers, vital for developing gourds. Pollination is key for a successful harvest. Bees are nature’s helpers, transferring pollen from flower to flower.
To encourage pollinators, plant companion flowers. This will attract bees and other beneficial insects. A variety of flowers boosts pollination success.
Enhancing pollination techniques:
- Grow nearby plants that bees love.
- Avoid pesticides harmful to pollinators.
- Hand-pollinate if bee activity is low.
Harvesting Loofah Gourds: When and How to Pick
Harvesting loofah gourds at the right time is crucial. Wait until the gourds have turned brown and dried on the vine. This ensures the fibrous interior is fully developed and ready.
To pick loofah gourds, cut them from the vine using sharp garden scissors or a knife. Handle the gourds gently, as they can be brittle once dried.
Tips for successful harvesting:
- Ensure the vine is dry before harvesting.
- Harvest before the first frost.
- Wear gloves to protect from prickly skin.
Processing and Preparing Homegrown Loofah Sponges
Transforming harvested loofah gourds into usable sponges is simple yet rewarding. First, soak the dried gourds in warm water for a few minutes. This softens the skin, making it easier to peel.
Once the skin is pliable, peel it off to reveal the fibrous interior. Remove any seeds by shaking or tapping the gourd gently. Keep these seeds for planting next season.
Next, rinse the loofah thoroughly to remove any remaining debris. It’s essential to ensure it’s clean for use as a sponge.
Processing Tips:
- Cut sponges to desired lengths.
- Rinse in a mild bleach solution to brighten.
- Air dry completely before use.
Creative Uses for Loofah: Beyond the Bath Sponge
Loofahs are not just for the bath; their versatility extends to many areas. Their fibrous texture makes them ideal for various household tasks. They can be used as natural scrubbers or even artistic craft materials.
Consider these creative uses:
- Kitchen cleaning pad for tough stains.
- Seed starter pots by filling segments with soil.
- Artistic decorations or DIY projects.
Each use emphasizes loofah’s ecological benefits, making them an excellent choice for sustainable living.

Growing Loofah Indoors: Can You Do It and How?
Growing loofah indoors is feasible with the right setup. You need adequate lighting and space for vines to thrive. Ensure your indoor environment mimics their outdoor conditions as much as possible.
Here’s how to successfully grow loofah indoors:
- Provide full-spectrum grow lights.
- Use large pots with well-drained soil.
- Install a sturdy trellis for support.
These steps help maintain healthy indoor loofahs, offering fresh greenery and a unique growing experience.
Saving Seeds and Planning for Next Season
Saving loofah seeds is crucial for ensuring a successful crop next year. Once your gourds dry, extract seeds and store them in a cool, dry place. This preparation facilitates a smooth start when the new growing season arrives.
Steps to save and store seeds effectively:
- Dry seeds thoroughly.
- Store in an airtight container.
- Label containers with the date and variety.
With these simple steps, your future loofah plants are set for success.

Sustainable Gardening with Loofah: Eco-Friendly Benefits
Growing loofahs offers numerous sustainable benefits. This practice aids in reducing plastic waste and fosters an organic lifestyle. Loofahs are versatile, biodegradable, and ideal for eco-conscious homes.
Key eco-friendly benefits of loofah cultivation include:
- Reduction in synthetic sponge use.
- Enhanced garden biodiversity.
- Promotion of organic growing methods.
Cultivating loofahs not only sustains the environment but also enriches your garden with natural beauty.

Frequently Asked Questions About Loofah Plant Cultivation
Many gardeners wonder how long loofahs take to grow. Typically, they require 150 to 200 days of warm conditions. Understanding this helps in planning your gardening schedule effectively.
You might also ask, “Can you grow loofah indoors?” Yes, with ample light and space, indoor cultivation is possible. Ensure they receive full sun for robust growth.
Here’s a quick list of FAQs:
- Where do loofahs come from?
- How do you know loofahs are ready to harvest?
- What does a loofah plant look like?
These questions often arise as you embark on growing this fascinating plant.
Conclusion: The Joys and Rewards of Homegrown Loofah
Cultivating your own loofah is a truly satisfying endeavor. It connects you with nature and promotes sustainable living. Watching these sponge plants thrive under your care feels rewarding.
By growing loofah, you enrich your garden and reduce reliance on synthetic products. Enjoying homegrown sponges enhances your eco-friendly lifestyle. Embrace the endless possibilities and benefits that come with loofah cultivation.
Ready to start your sustainable gardening journey? Dive deeper into unique plant guides and eco-friendly tips by visiting Sprout sanctum for more inspiring content for your garden and home!